Sending automatic email reports from Imply Pivot
Imply Pivot has the built in capability to send scheduled email reports on a regular basis. However, a few things need to be configured correctly in order to make this work. Here is a comprehensive list of the required settings.
I am going to show this using the evaluation quickstart of Imply version 2021.07. I am using the unmanaged evaluation version, for installation instructions see here.
License
The reports feature needs to be enabled in the license. If you are running the 30 day evaluation, this is included. Otherwise, make sure that the license file you got from Imply has the "scheduled-reports" feature enabled.
Configuration settings
All settings need to be entered in pivot/config.yaml. For quickstart, the full path would be imply-2021-07/conf-quickstart/pivot/config.yaml.
User management
If you do not enable user management you will not be able to use the Reports feature.
By default, the quickstart package does not use user management - there is no login screen. You can create reports, but the report distribution settings will not be available. Use the setting
userMode: native-users
in pivot/config.yaml to enable user management. After this is enabled, upon first opening Pivot you will be asked to create a user account to log in.
SMTP server settings
SMTP server is configured using the mailTransportOptions setting in pivot/config.yaml. The server address and authentication settings are straightforward, but SSL settings are a big caveat.
My mail server uses port 587 with STARTTLS. Counter-intuitively, this only works when you set secure: false. Here is the configuration snippet:
mailTransportOptions:
  host: 'my-domain.com'
  port: 587
  secure: false
  requireTLS: true
  auth:
    user: 'username'
    pass: 'password'
Pivot uses Nodemailer behing the scenes: you can look up the full list of available options here.
Default sender
You have to set the default mail sender. This will appear in the From: field of emailed reports.
defaultSender: '"Imply" <imply@my-domain.com>'
Mail template
You will need to configure a template for the mail format. This is a HTML snippet that contains placeholder variables for the report data and metadata. Here is an example:
emailTemplates:
  - name: 'reports'
    subject: '${title}'
    html: |
      <html>
      <head/>
      <body>
        <h2>${title}</h2>
        <dl>
          <dt>Description</dt>
          <dd>${description}</dd>
          <dt>Time frame</dt>
          <dd>${timeFrame}</dd>
          <dt>Filters</dt>
          <dd>${filter}</dd>
        </dl>
        <p>
          ${data}
        </p>
      </html>
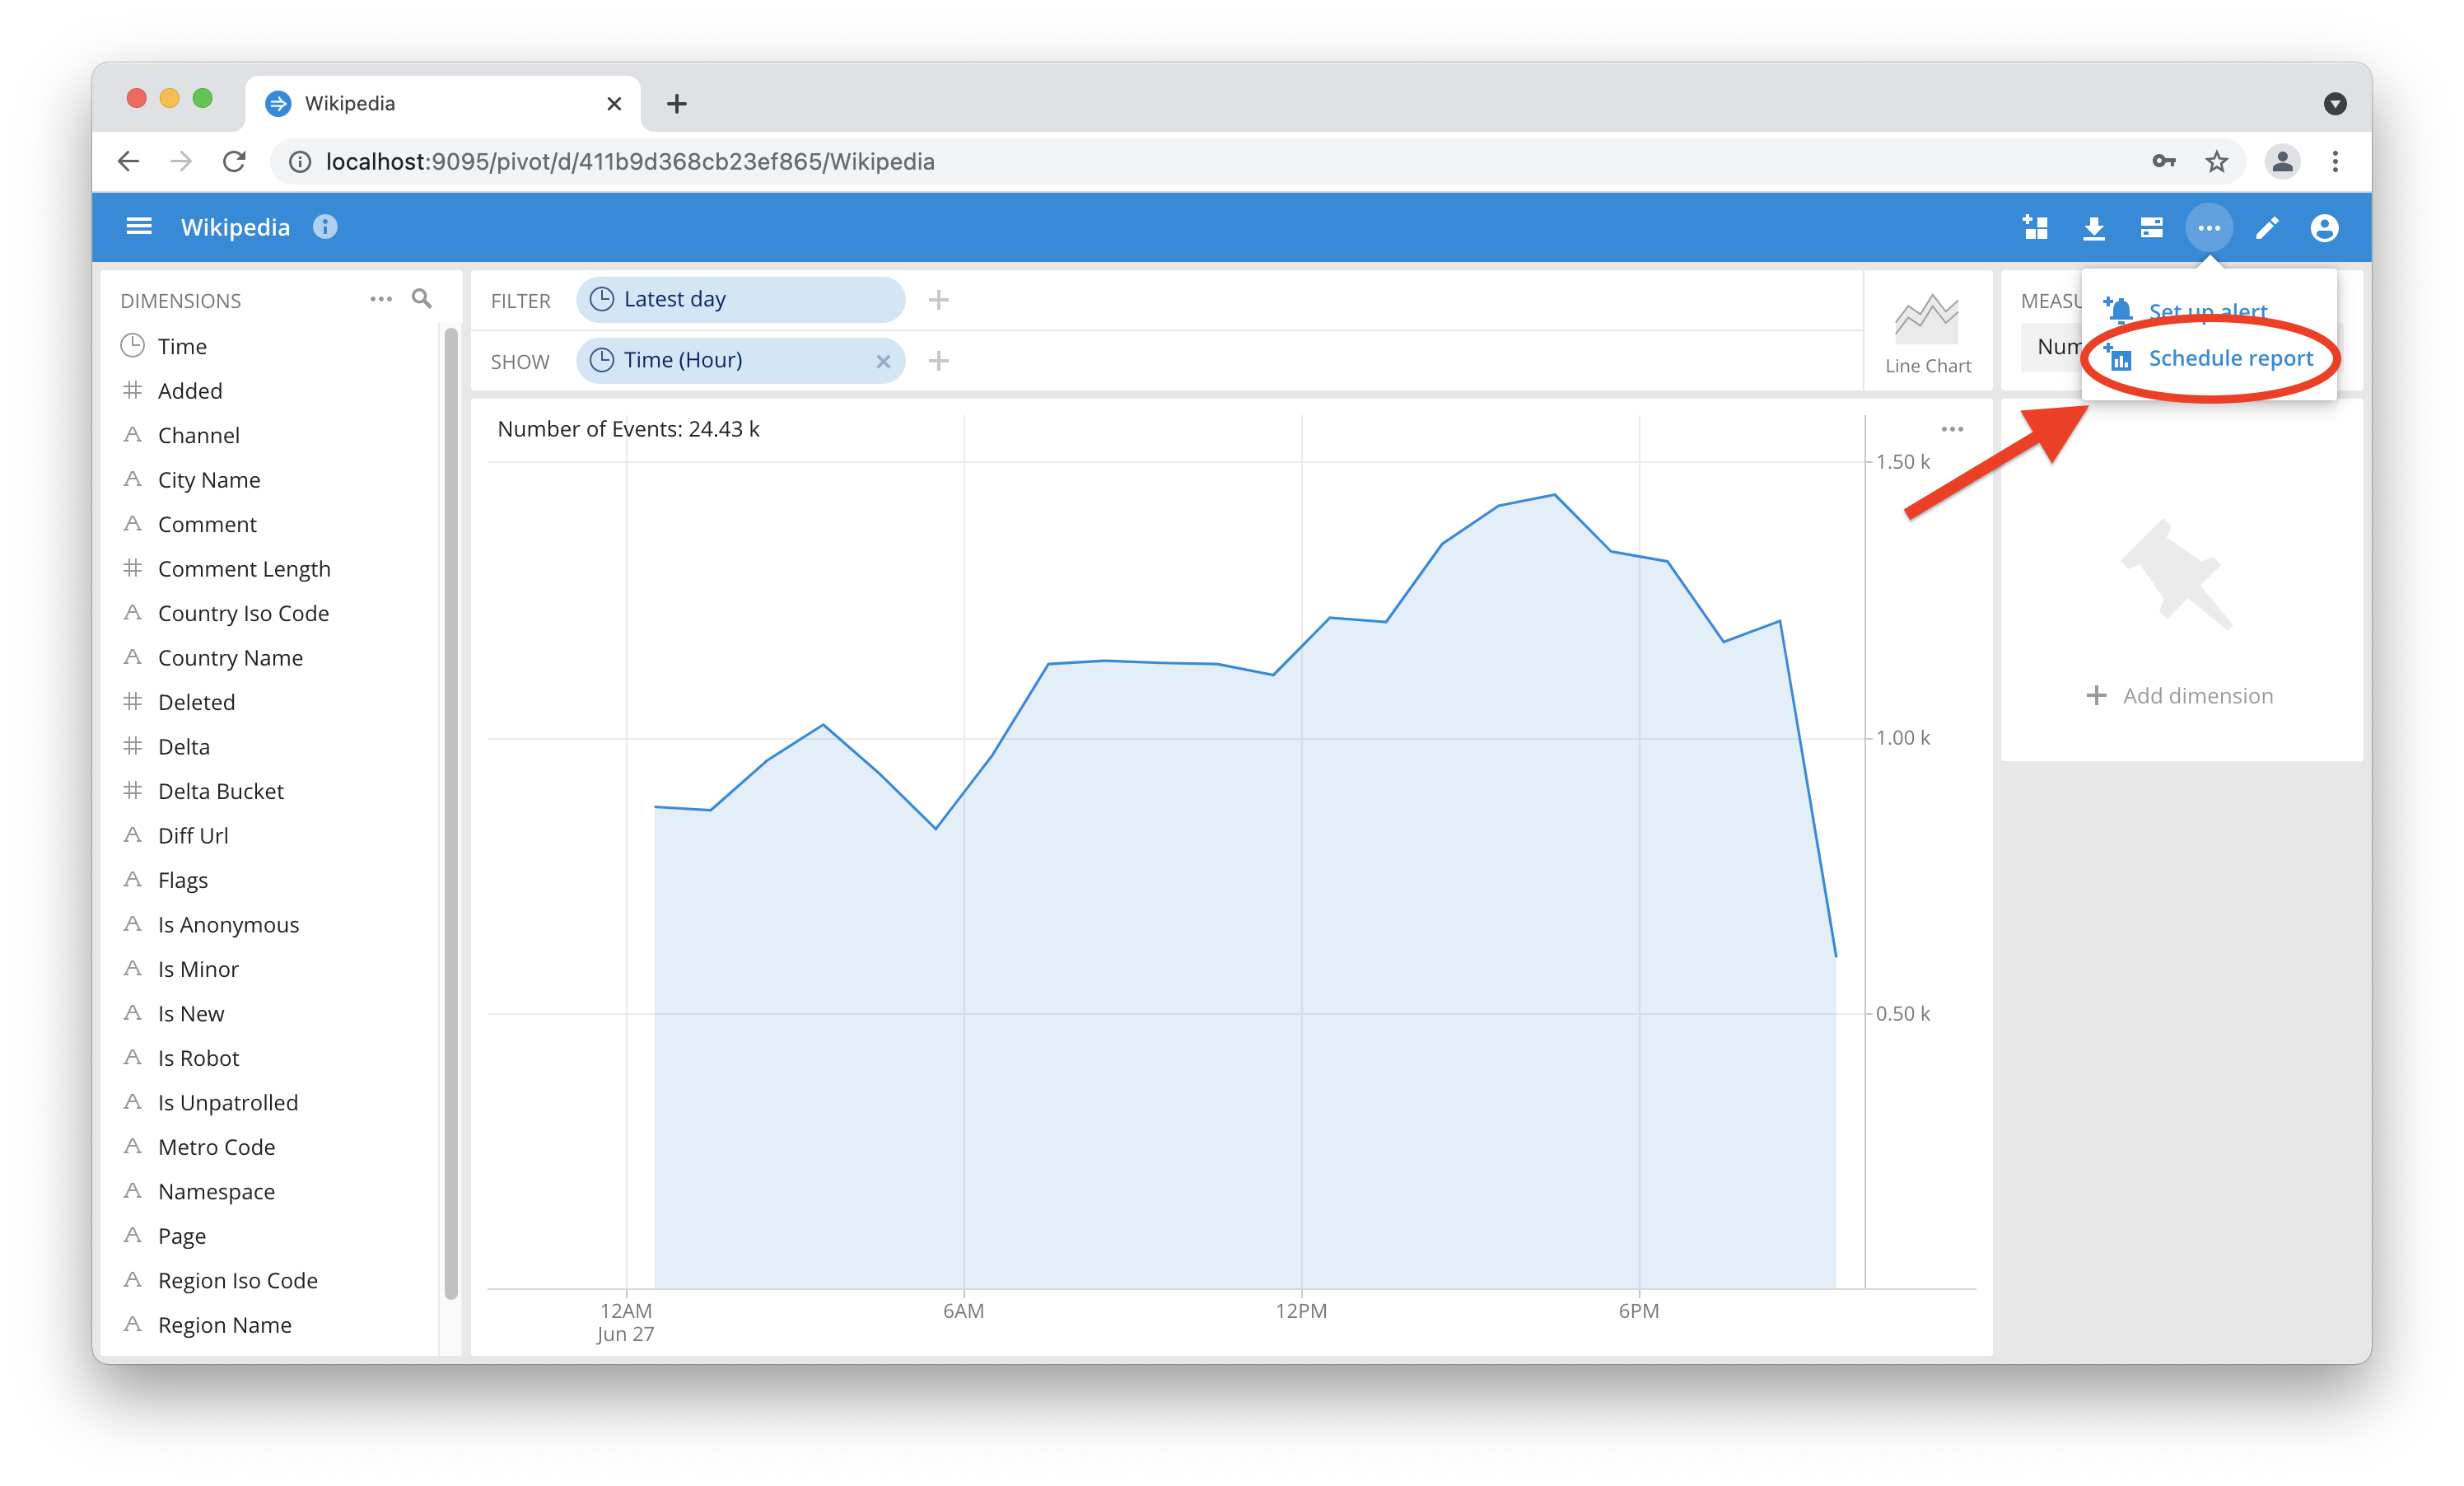
Now you are ready to start Imply. Proceed with the quickstart until you have the Wikipedia cube ready and open in Pivot. Create a simple view, for instance Number of Events over Time. From here, go to the ... menu and select “Schedule Report”:
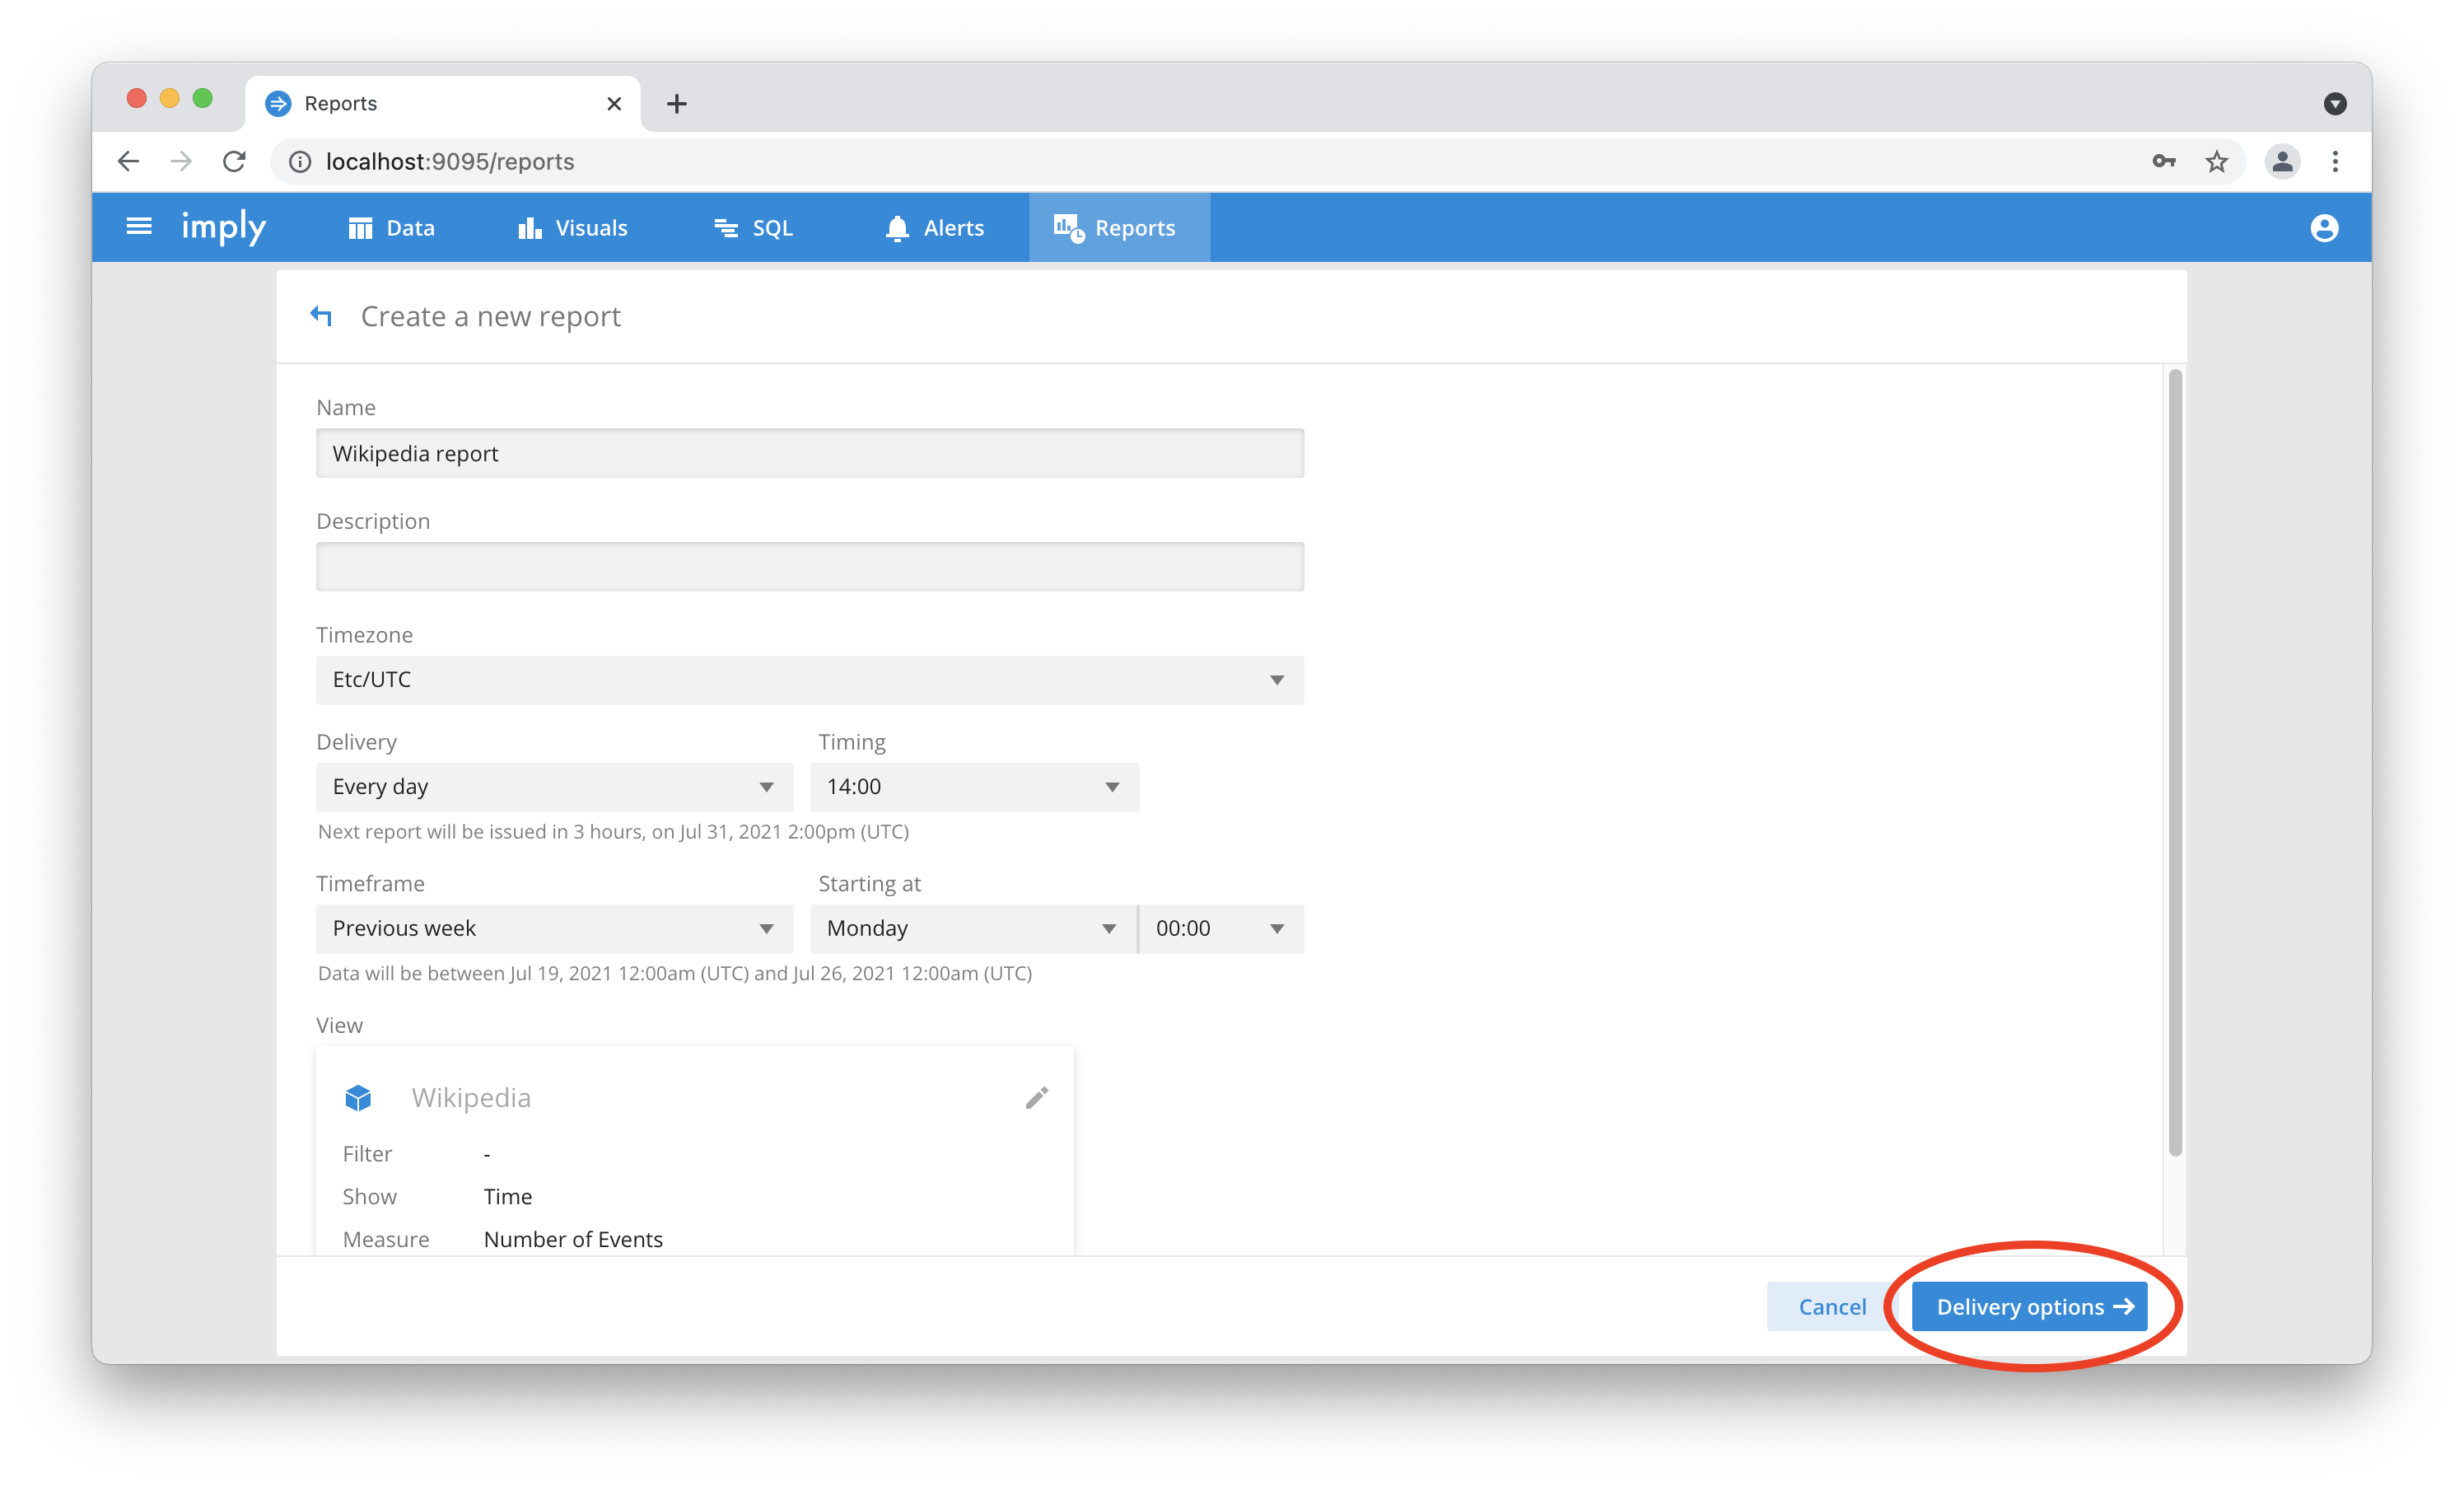
In the next screen, configure the report and its cadence. Check that the preselected timeframe for the report matches your expectations. Click on “Delivery options” to proceed:
Finally, configure the delivery options. Here you can choose the data format, the recipients (either by role or by individual account), and you can configure external recipients. You also have a “Deliver now” button to test your report:
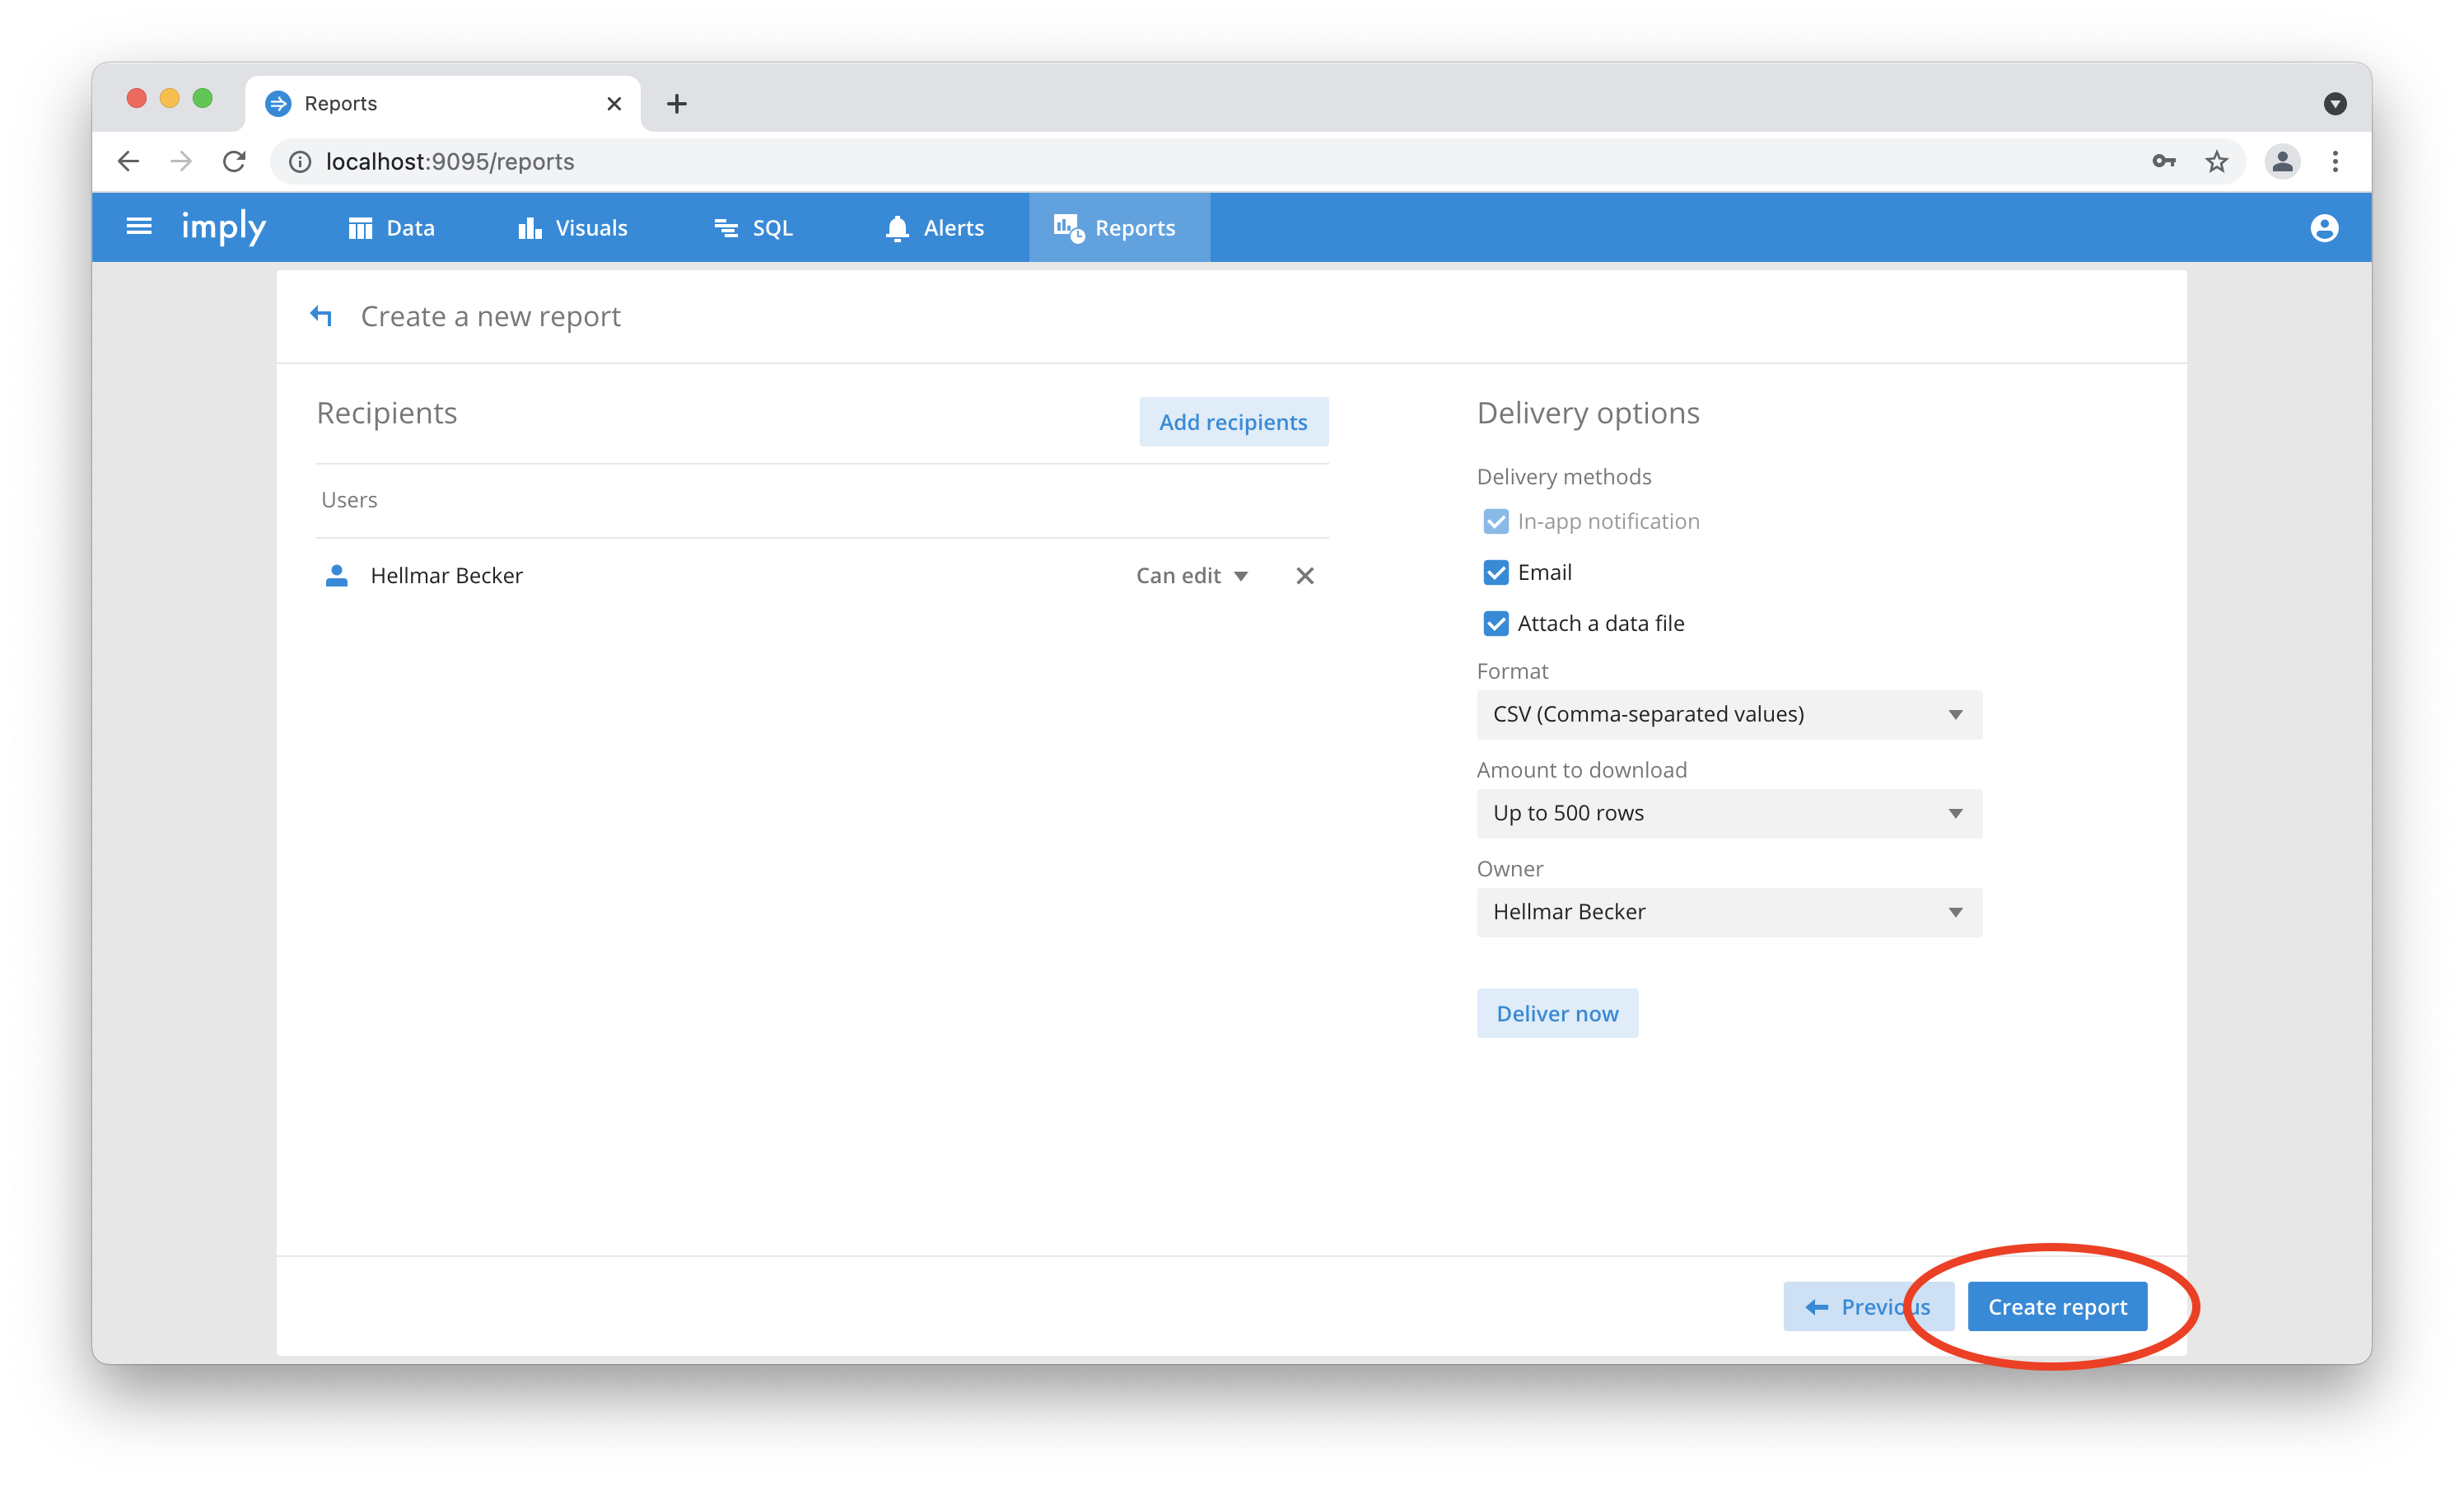
If you are happy with the result, use the “Create report” button to save your work.
Learnings
- You have to enable user management before you can use reports.
- You have to set up the mail server to use reports.
- If you use secure mail with STARTTLS, you have to set
secure: falsein the SMTP options.